VENEER AND BONDED FILLINGS
CASE STUDY—Scott B.
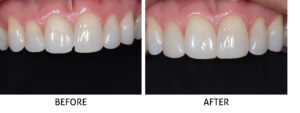
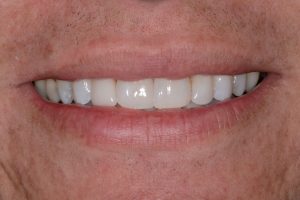
“The edges of my teeth are chipped, and I think the edges look too rounded. Also, the right lateral incisor does not look like the one on the left. I would like the teeth to be symmetrical.”
My first step in a case like this is to make sure the patient’s complaint is understood. The best tools to communicate esthetic information are by using photographs and stone models of the patient’s teeth. The photographs include close up photos as well as smile photos, which I can enlarge on a computer screen, making it easy for the patient to communicate what it is about their smile or teeth they do or do not like. This communication takes place in a one-on-one consultation appointment. The purpose of this consultation is to clarify the patient’s concerns but also for me, as their dentist, to give a step-by-step review of findings. This review of findings is a systematic way of helping the patient understand the etiology (the study of causation) of their complaint and understand the various methods that could be used to treat the issue at hand. Once the chief complaint has been clarified, and a treatment plan has been established, the stone models, (plaster casts of the teeth), allow me to do a mock-up of the desired changes using wax.
The esthetic changes made to the teeth on the models can then be transferred to the mouth on the first clinical visit, using provisional restorations.
Provisional restorations, (sometimes called “temporaries”) are made out of tooth-colored plastic. When crowns or veneers are made for teeth, the first step is to shape the tooth to accept the final restorations.
The final restorations are made of ceramic and usually take at least two weeks to fabricate in a dental laboratory. Therefore, the temporaries are placed on the teeth in this interim period to protect the prepared teeth and to serve as a facsimile of the final restorations. In some cases, the provisional restorations may be worn for an extended period to allow the patient to evaluate the esthetics, phonetics, and function of the restored teeth prior to getting the permanent restorations.
The provisional restorations can be modified, if necessary, and can become a template for the laboratory to use to create the ideal final restorations. In this manner, the patient can approve the look and feel of the final restorations prior to having them permanently bonded to the teeth.
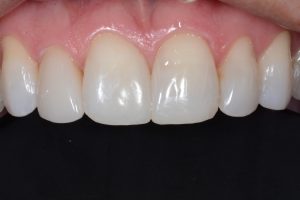
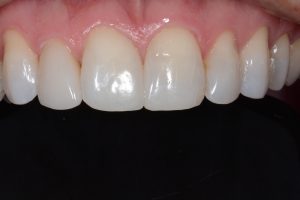
In Scott’s case, two different dental techniques were used to re-shape his upper front teeth. The first method, called “resin bonding,” is a technique in which tooth-matching filling material called “composite” is hand-sculped and bonded onto the teeth. This technique is ideal in cases where minor changes in the tooth contour are desired. In this case, the two central incisors, (the two center teeth in the photo), were re-shaped using bonding.
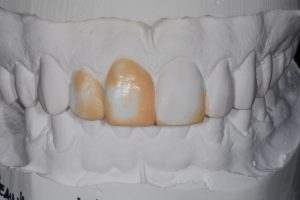
Bonding blends seamlessly with the natural tooth structure, so it’s difficult to see where the material was added. The area where composite was added can be seen by looking above at the photo of the diagnostic wax-up. The areas that have tan-colored wax are the same areas where composite was bonded to the enamel.
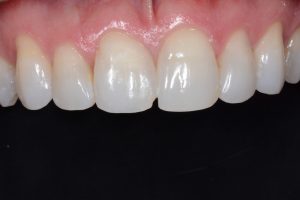
Scott was happy with the appearance of the provisional restoration on the lateral incisor, so there was no need to make modifications to the provisional. If the provisional was unsatisfactory in some way, it would’ve been easy to add or take away material, as it was made out of composite—the same material the bonding was done with. Since there were no changes needed, photos of the provisional restoration were used as a template for the dental laboratory to fabricate the final restoration. Unlike the provisional restoration, the final veneer restoration can’t be added to; the veneer is made from ceramic, which can be ground down but can’t be added to, like the provisional material. That’s why it’s important that the desired contours are worked out in the provisional stage. Major changes may require remaking the final restoration.
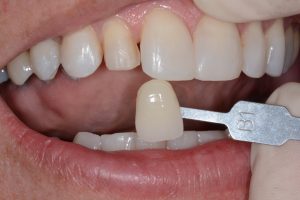
The next step was to remove the provisional restoration so that a mold could be made of the teeth, and a shade-matching photograph could be sent to the lab technician.
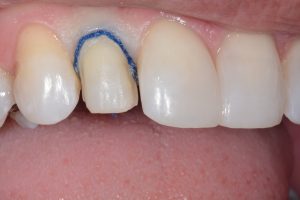
The molding process requires that the gum tissue be gently pushed away from the tooth with a yarn-like material called “retraction cord.” That’s the blue-colored string between the gum and the tooth that you see in the photograph below.
After sitting for about five minutes, the retraction cord was removed and a silicone impression material was used to make a mold of the teeth.
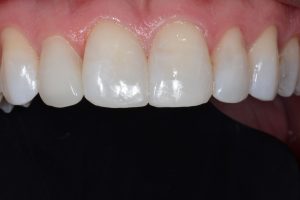
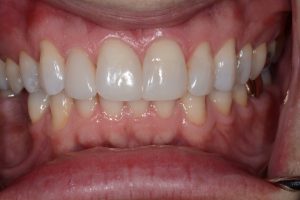
This silicone impression was sent to a dental laboratory, and through a series of steps, a “working model” of the teeth was made. This duplicate of the teeth was used by the lab to make the ceramic veneer, which was then returned to my office two weeks later to be delivered to the patient. This second “cementation” appointment was to try in the restoration for fit and to make sure the color was correct. In this case, the color and shape were identical to the provisional, so the ceramic veneer was bonded to the tooth to make it permanent.

